Latest Blog
Introduction to the relevant operation process of the nanosecond UV laser marking machine
Oct 14 , 2021
1. Before starting:
Before starting the machine, please clean the work surface, check whether the laser marking machine is safely grounded, and check the power cord of the marking machine to make the connection correct and reliable.
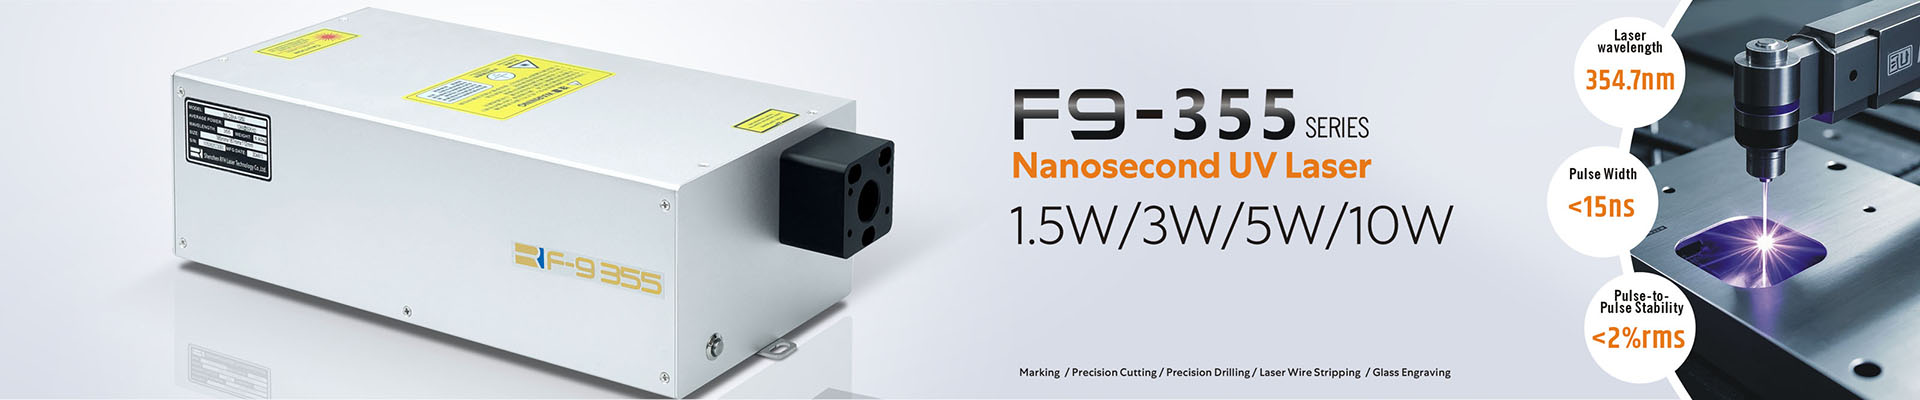
laser marking machine
2. Booting steps:
①. Turn on the power of the laser engraving machine (after the power is turned on, the work indicator light is always on and the fan is running); ②, insert the key switch, and turn it 90 clockwise to the "on" position; ③, turn on the industrial control switch, the industrial control computer will automatically Start and turn on the laser marking software; ④. Make sure that the emergency stop switch is not turned on (that is, the switch bounces up, it is automatically closed); ⑤. Turn on the key switch, turn on the laser switch, and the laser system will automatically start; ⑥, remove the laser Galvanometer protective cover.
uv laser | green laser | Ultraviolet lasers | uv dpss laser | nanosecond laser | UV laser source | Solid State Lasers
3. Marking operation:
①, open the marking software; ②, select the marking file → open → select the file to be marked (or create a new and edit the image and text to be marked); ③, alignment: mouse click on the "red light" below, the laser head will release The red box is shot on the marking part, and the workpiece is translated to make the box fall on the part to be marked. After adjustment, click to stop the "red light", and then fix the tooling. (Note: The alignment must be rapid, and the red light should not be used for too long, so as not to shorten the life of the light-emitting head.) ④. Focusing: Place the workpiece template at the place to be marked, then check the continuous marking, and click the mouse. "Continuous processing", then click "Mark", shake the handle to adjust the Y-axis up and down, until the laser acts on the workpiece with the strongest energy, the most crisp sound, and the brightest color, which is basically the focal length. (The RFH laser editor here kindly reminds you: "Continuous processing" is only used for focusing. After the focus is adjusted, please remember to turn off "Continuous processing" before operating.) PS: Manual focusing, speed It is slow, low in efficiency, and the focusing accuracy cannot be guaranteed, so that many waste products are produced; for this reason, RFH LASER independently developed a system ------ automatic focusing system.
The automatic focusing system can be configured on any laser engraving machine. Only need to install a vision positioning system on the original laser equipment, through the vision positioning system to achieve automatic focusing and marking, even if there are slight differences in the thickness of the workpiece can also achieve automatic focusing.
⑤ After the trial engraving is OK, you can press the "Mark (F2)" key to start marking. (To mark multiple workpieces, just repeat this step).
The above is the first time to mark a marked part. Save its graphics and marking parameters as a file, and measure the height of the laser head and the marking surface. The file will be retrieved from the computer and the height will be directly adjusted during the next production. Ready to mark.
4. Shutdown steps
①. After confirming that the industrial computer is not running any software, turn off the key switch, turn off the laser switch, and the laser system will automatically shut down; ②, turn off the laser marking software; ③, turn off the industrial computer in the computer system; ④, turn off the main power switch; ⑤ 、Remove the key and keep it by a special person for future use; ⑥. Put on the lens cover.